Gasp!! There has been a shift in the force…of the Internet…
The disturbance is real but don’t be alarmed! We’ve got you covered. We’re going to show you, step by step, how to setup your email with your own domain name and still use it in Gmail without having to pay for Google Apps for Work! (And, just so you know, if this gets too complicated or you just don’t have the time…we’ve got you covered there too!
This walkthrough will be longer than others that you’ll find because, not only am I going to tell you how to setup your email with your own domain name and setup an email forward…I’m going to help you set it up so you can Send Mail AS that email as well!
That’s important considering you’re sending out from that email address in your ESP (Email Service Provider…aka MailChimp, ConvertKit, Aweber) and if someone replies and you reply back – you don’t want it coming from a DIFFERENT email address do you? Was that confusing?! Well, the answer is no!
For this walkthrough I’m going to be showing you how to do this if you’re hosted on BlueHost. The steps should be able the same on other platforms, it’ll just look different. Alright, here we go!
Step 1: Create Your Domain Name Email Address
- Log into your host cPanel (BlueHost, GoDaddy, HostGator…)
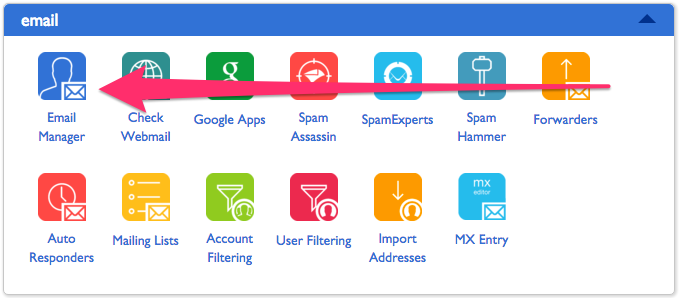
- Go to Email section of your cPanel and select “Email Manager”
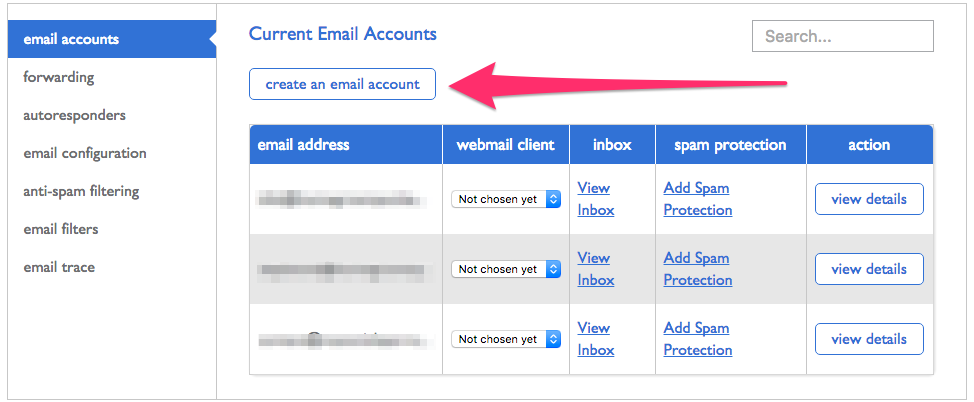
- Select “Create an Email Account”
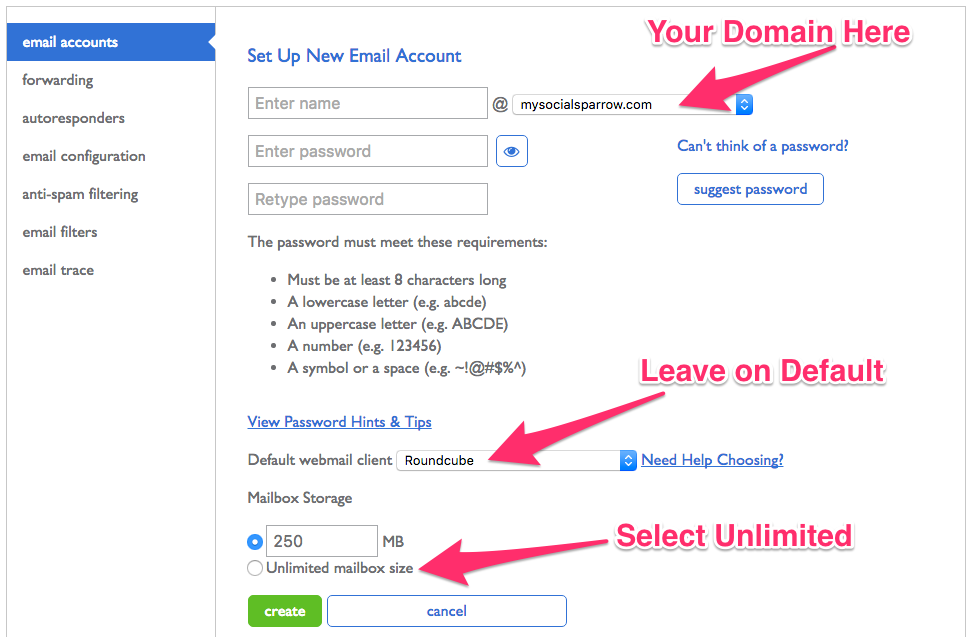
- Select your email address name. If you own more than one domain, be sure to select the correct domain in the pull down box.
- Enter a password that meets the requirements and copy it somewhere (you’ll need it later).
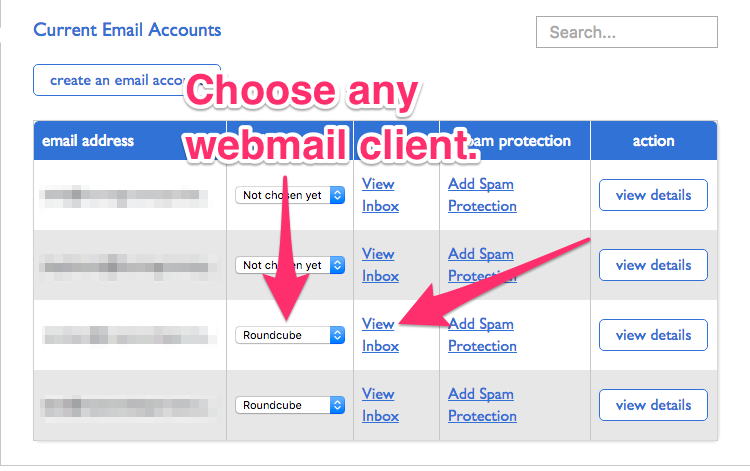
- Leave “Default Webmail Client” on whatever it defaults to as long as one is selected. I’ll be using Roundcube for this walkthrough. Don’t worry, you’ll only be using this while you’re setting up your new domain email address.
- Select “Unlimited” mailbox size.
Congrats!
You just created your brand new domain name email address!!
But WAIT! We’re not done!
Step 2: Setup Your New Domain Name Email in Gmail to “Send Mail As”
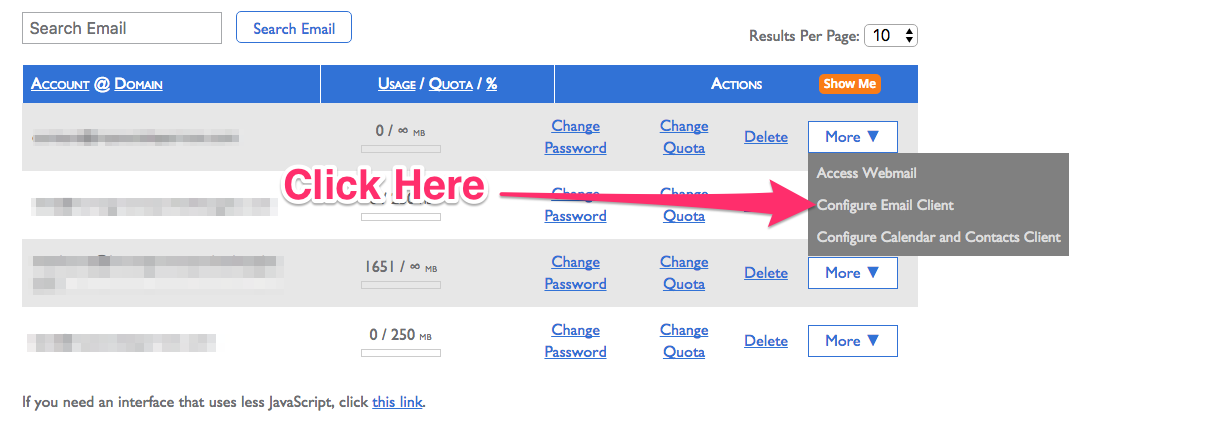
- Next you’re going to go back to your “Email Manager”, find your new email and click the drop down box, select “Configure Email Client”
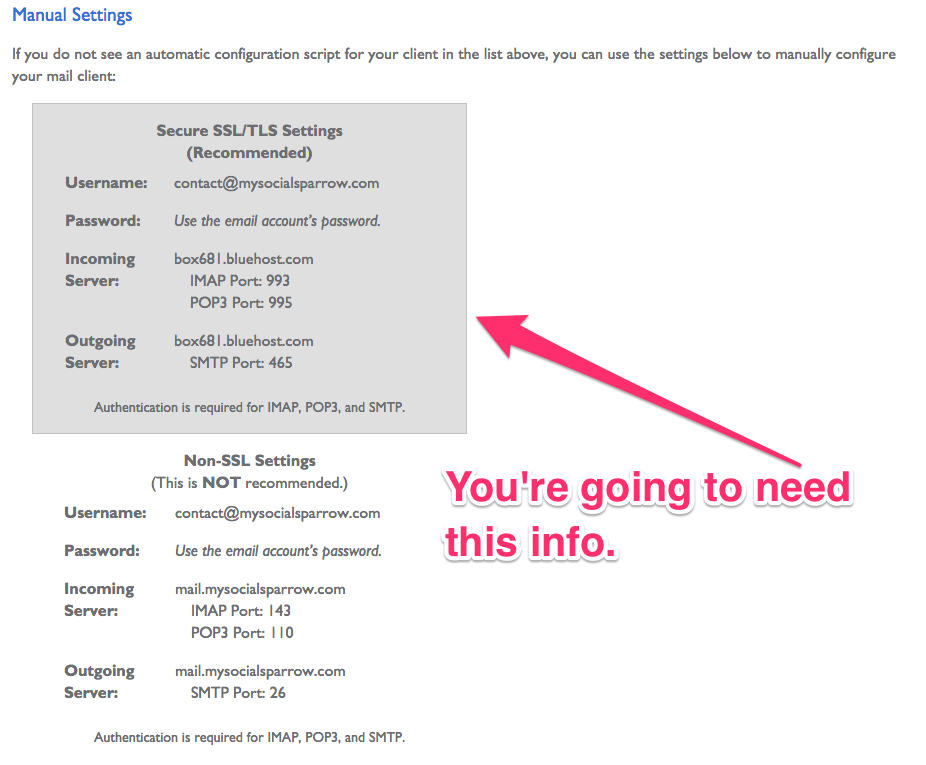
- This is going to take you to this screen – you’re going to need this info so leave it open and open a new tab.
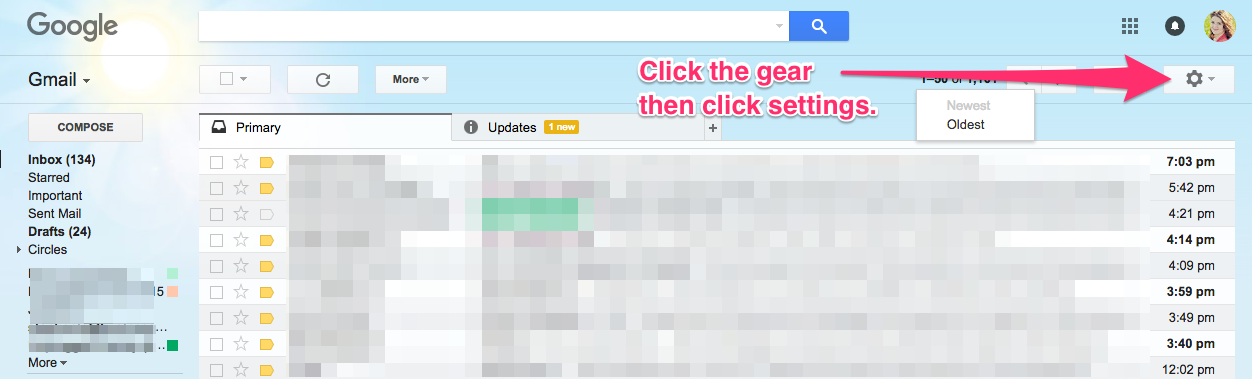
- Go to your Gmail account and click the gear in the upper right hand corner and click “Settings.”
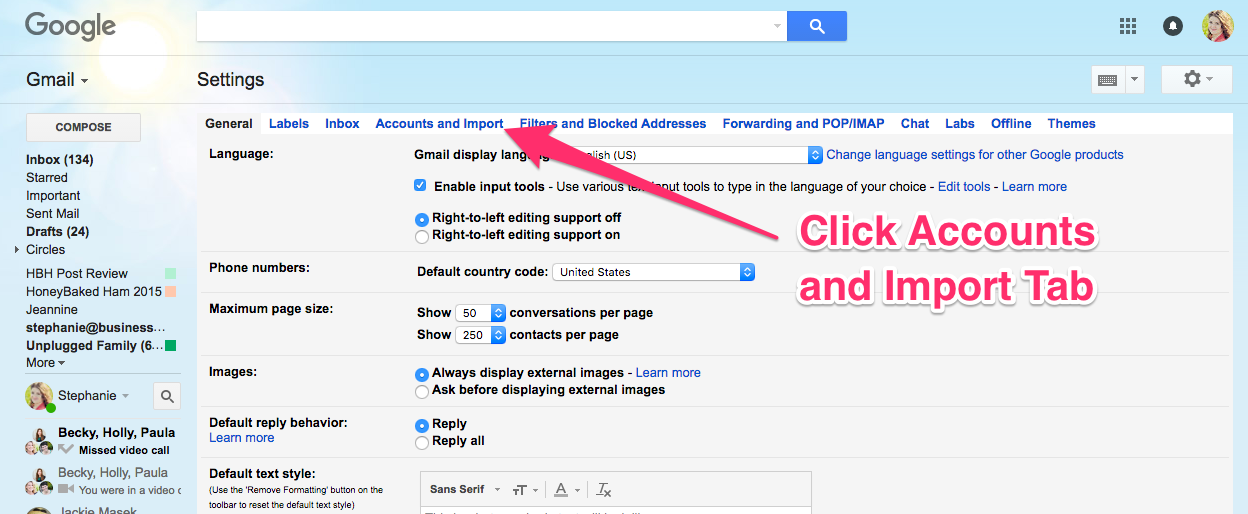
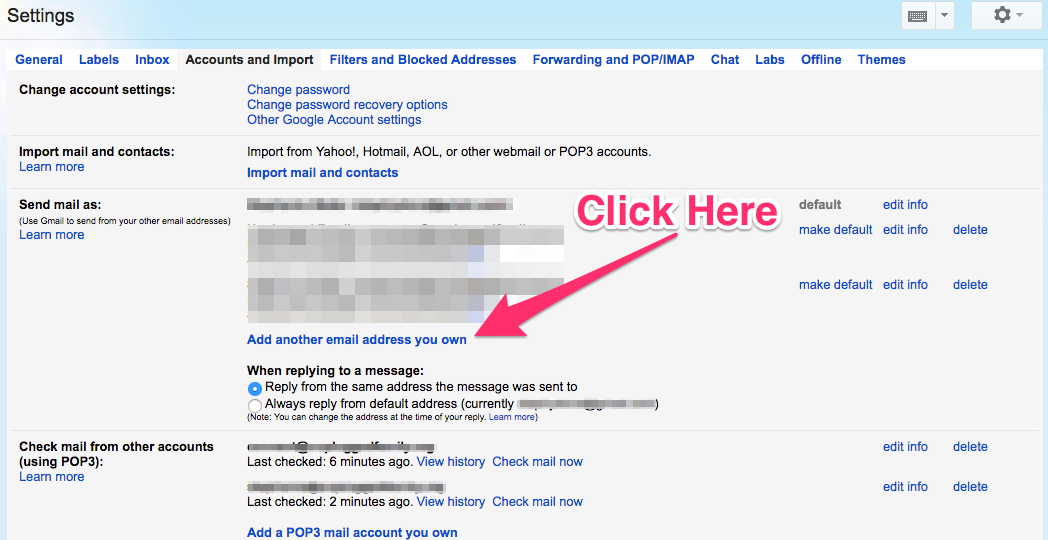
- Click the Accounts and Imports tab.
- Go to the “Send Mail As” section and click “Add another email address you own.”
Alright, take a deep breath for me, this is going to get a little tricky…
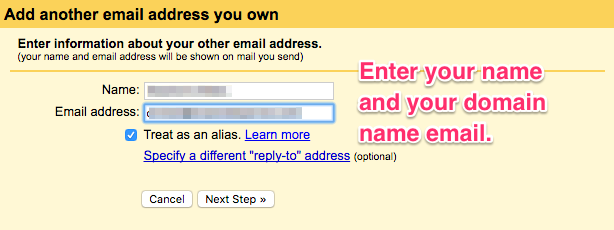
Enter your name (as you want it to appear) and the new domain name email you just created and click “Next Step.”
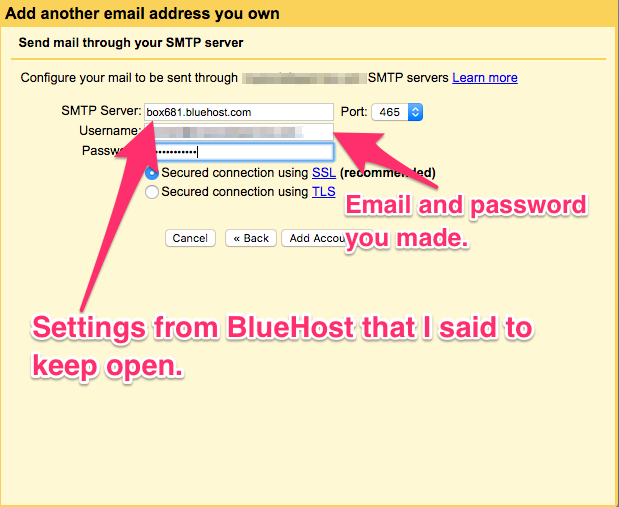
- In the next box, enter the information that I told you to leave open. Secured connection using SSL should be preselected. Leave it that way. Once you’ve entered everything, click “Add Account.” Like this:
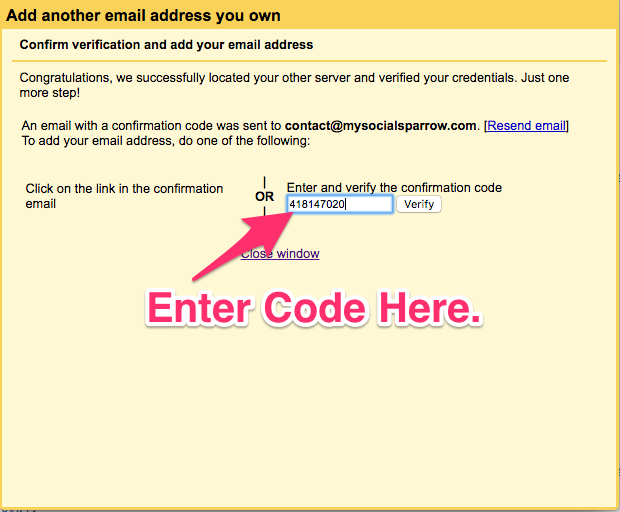
- Now you should see a box that is asking for a verification code.
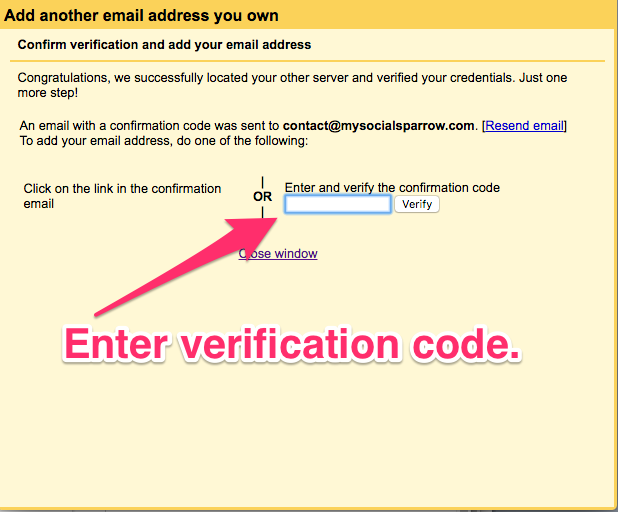
Here’s where it gets a little tricky…hang in there…we have to go get that verification code. We’ll need to do that from within your new domain name email from within your cPanel. Don’t worry, I’m walking you through it…
- Go back to your cPanel and select “Email Account Manager” again. Beside your new email address make sure “Roundcube” is selected and then click “View Inbox.”
- It’s then going to ask you to sign in. Just use your new domain name email and password.

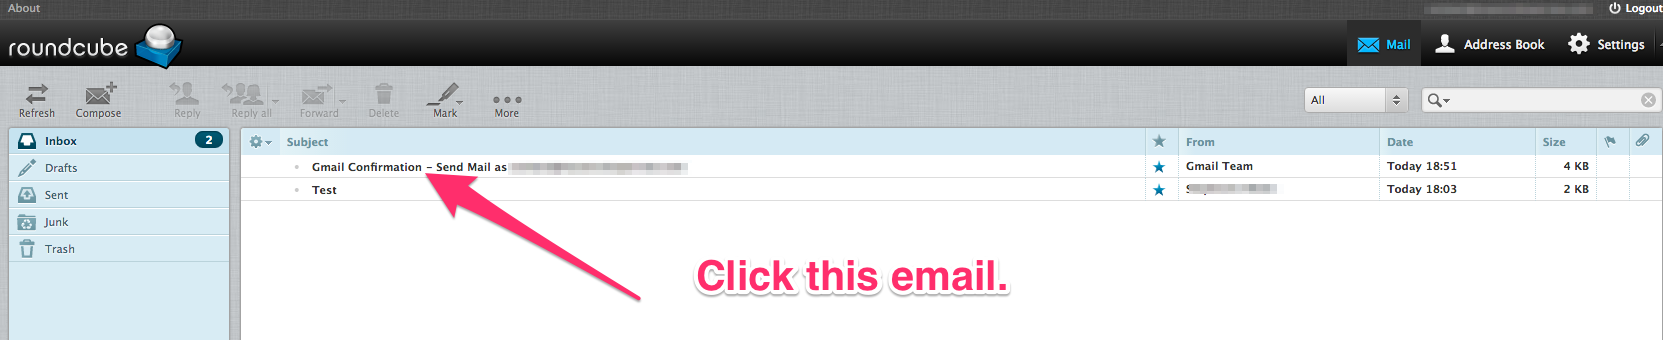
- Once you’re signed in, locate the email from Gmail and click on it to open it.
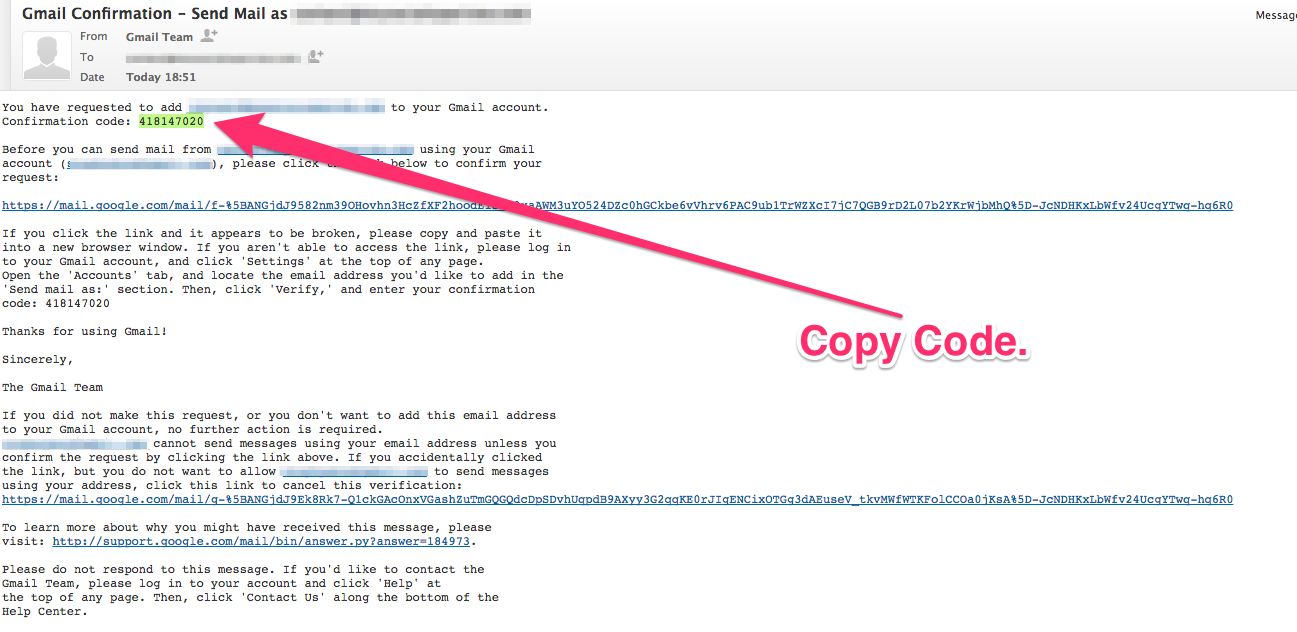
- Once it’s open, copy the confirmation code.
- Now go back to the yellow box that is requesting the verification code and paste it in and click “Verify.” Make sure that you didn’t copy a space before or after the verification code because that will cause it not to work.
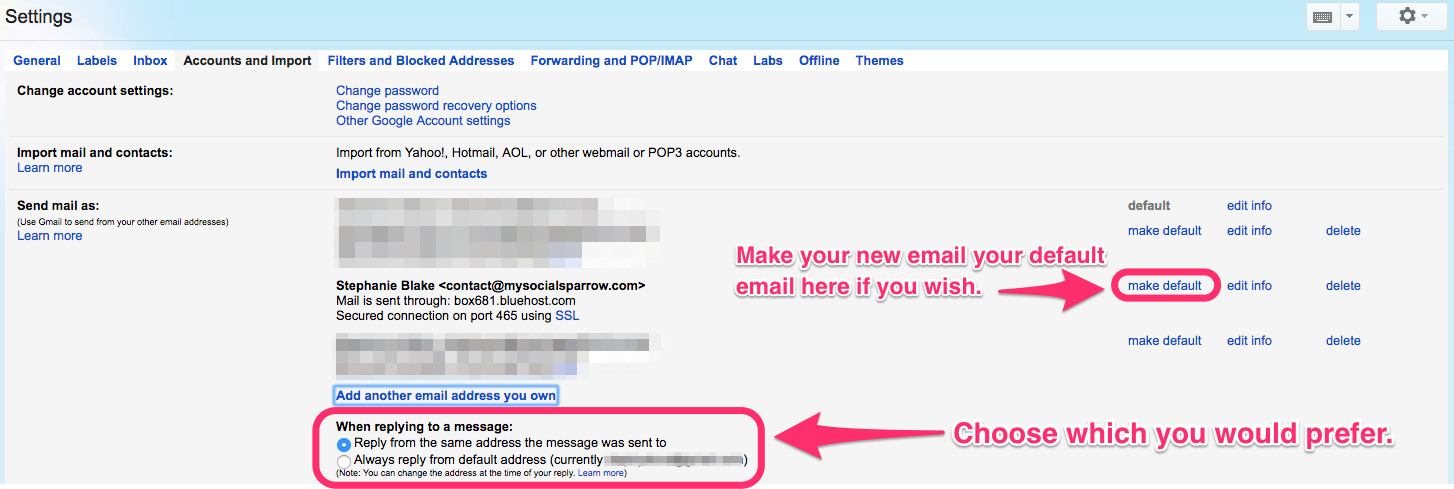
- Find your way back to the tab that is open to the “Accounts and Import” settings in Gmail. You’ll want to make some decisions here.
Decision 1: Would you like to start sending mail as your new domain email? If you want to make it your new default email, simply go to the right of your newly setup email and choose “Make Default.” From here on out, when you send an email from Gmail it will go out with your new domain email! How cool is that?!?!
Decision 2: Next, you’ll need to decide if when you’re sending an email, you’d like to reply as the same address that the message was sent to (either your Gmail address or your new domain name email) OR if you’d like to ALWAYS reply from your default email address (the one that is selected as your default email above.
 You’re almost done. Just one more step…now we need to Forward emails that come into your new domain name email to your Gmail account.
Step 3: Forward Your New Domain Name Email to Your Gmail Account
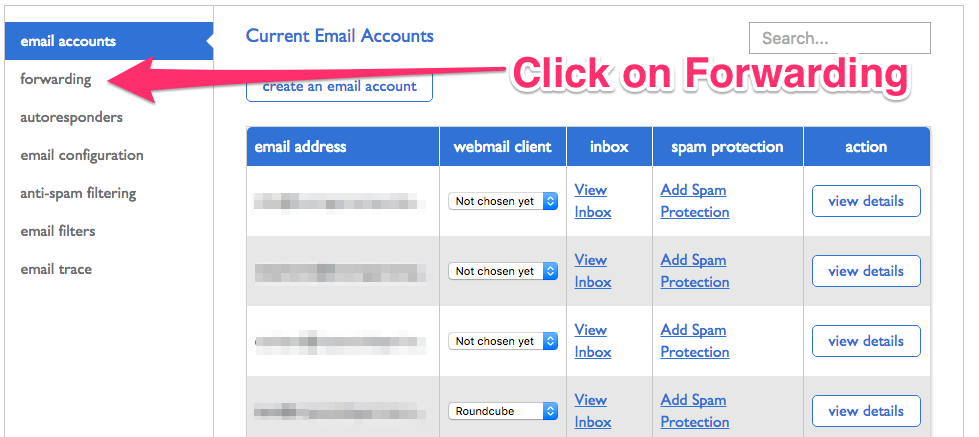
- Let’s go back over to BlueHost. Select “Email Account Manager” again. This time you’re going to go to the “Forwarding” tab.
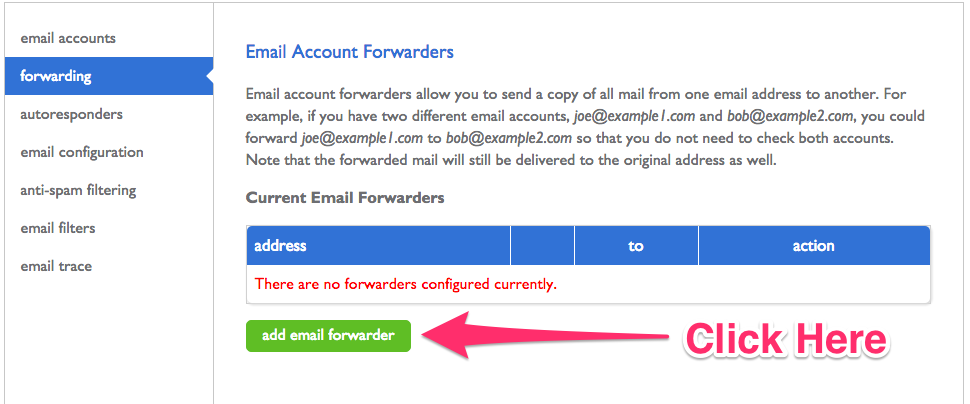
- Click “Add Email Forwarder.”
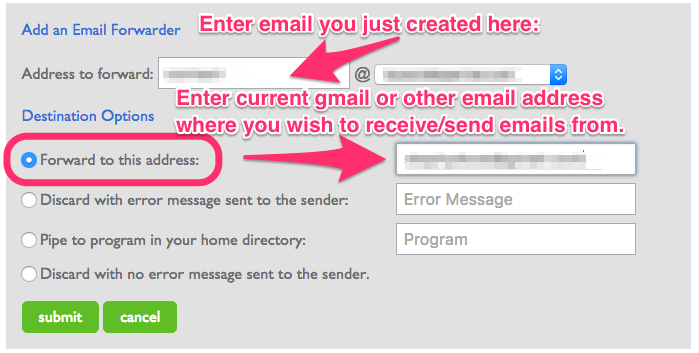
- Enter the domain name email that you just created at the top.
- Make sure that “Forward to this address:” is selected and then enter your Gmail address then click Submit.
And that’s it!! You’re all set!!!


 Equipment I Use for Facebook Live Video
Any suggestions for ways to do this with blogger and yahoo mail?
Wow! This was an amazing, step by step, clearly guided email setup. I was sent here by my bloggier friend Kirsten Oliphant through a blogger FB group and I’m so glad she did! This was awesome and it worked seemlessly! Now to send an email to my mailing list from my new email! Thanks! God bless you!
This was so helpful!! It wasn’t too difficult thanks to the awesome instructions that you give. Pinning and sharing!
Whew, I just did this! It took about half an hour because I messed up a few times, but I think it is all good now.
In step 2, the email configurations are now in the menu to the LEFT of the account names, not in a drop down menu.
And when you enter the information into the yellow box, I should clarify that it is the 2nd set of info, under the SSL heading.
Also, make sure you don’t have typos when you enter your new address, or the verification email won’t work. Duh!
Other than that, this was a great tutorial, thanks for posting it because I did not know how to do ANY of that!
Worked like a charm & I was scared! Thank you!
Now, I’m a very tech savvy guy and all… and I’ve set up a few email accounts like this… however, I’m having difficulties with one. Domain hosted by GoDaddy, website hosted at ThisWebHost.com (with cPanel)… set up everything as recommended, but when I sent the verification from Gmail, it bounced saying the email address does not exist. I have tried it multiple times with this server, and I’ve even successfully sent an email FROM the new email address to the Gmail address. Google isn’t recognizing the new email address valid. I’ve also triple checked (every time) the spelling, punctuation, and spacing of everything. HELP?
Hey Patrick, Stephanie here. I’m sorry about that – that can be extremely frustrating. If I were you, I would delete the email address in cPanel, delete it from within Gmail in the Settings and start over. I’ve only ever had trouble with the process a few times. One time it was because I was copying a SPACE with the email & one time with the verification code – by accident. The other time, I couldn’t figure out what was wrong so I undid everything and redid it and it worked fine. I never figured out what was wrong. I hope this helps!!! Best of luck!
WOW. Your steps were so easy to follow. Thank you :). I feel like a ninja now 🙂
You’re so welcome!!! We ARE ninjas 😉 Shhhhh….
I like what you guys are up too. Such smart work and reporting! Keep up the superb works guys I have incorporated you guys to my blogroll. I think it will improve the value of my site ccafddegeegkdfdg